|
Why You Need a Pressure Canner
If
you're new to home canning, you might wonder why you need a pressure canner. A water bath canner is fine for fruit, but vegetables
and meats need to be processed at higher temperatures. At one time it was thought that all tomatoes could be canned in a water
bath canner. Many of the newer varieties aren't as acidic and the guidelines have changed. Some of these now need to be pressure
canned. If not, these food items can cause botulism. I
can already hear some of you saying, "Grandma never had a pressure canner." My Grandmother canned her green beans with a water
bath canner too, but I'd never do it. The possible results are just too scary. Thanks goodness she didn't home can meats. Another advantage of having one is that you are able to process
your fruits much quicker. If you have a large number of jars to preserve, you'll appreciate this.
What is Botulism?
Botulism is rare, but is serious
enough that you want to be safe. It is caused by a poison Clostridium Botulism. It is found in the soil almost everywhere.
The spores are resistant to heat, unless it is at 240 degrees Farenheit or more. Acidic foods such as fruit are resistant
to the spores, but meat and vegetables aren't. In some cases botulism is even deadly. Just touching the jar lid and then touching your mouth,
is enough to kill you. It causes paralysis that usually starts in the face and spreads to the limbs. In extreme cases it results
in paralysis of the respiratory system and then death. To kill the spores, you need higher temperatures than a water bath canner will
reach. With a water bath canner, the highest temperature that can be reached is 212 degrees Fahrenheit. Pressure canners can
reach 240 degrees. A
word of caution is not to use old canning recipe books. Processing times have changed over the years, as more has been learned.
A good idea is to check a current guide.If you aren't sure when reading a recipe, use the vegetable that takes the longest
time and use that to figure out how long to process.
What Size Canner Should You Have?
There are different
types and sizes. First you need to determine how much you'll process at one time. You can get as large as 44 1/2 quart canners.
This size doesn't mean that it will hold that many jars, but is the size of the pan. One this large will hold 32 pint jars
or 19 quarts, if the jars are stacked. If you plan on processing a large number of jars this would work well for you. Also available
are pressure canners that hold as few as 4 pints at a time and almost any size in between. I like a small one so that I can
process just what I have picked in the garden that day. My garden is small, so this works well for me.
Which Brand Should You Choose?
There are different
types and brands. The most available brands are Mirro, Presto, and All American. Be sure to choose one that you can easily
find replacement parts for. You can call your local hardware store and check sites online for parts. Gaskets need to be replaced
from time to time and sometimes pressure gauges. You may blow the fuse in the lid and then you'll need to replace that. My old canner is
a Mirro. At the time I purchased it, it was a good brand to buy. Many people are no longer recommending these, because they
say they aren't the quality they once were. The lock springs may break and the gauges may also. I'm looking for a larger canner
to process meat than I now have. I guess I'll buy a different brand this time. Another model is the Presto. I've heard good things about these,
but haven't tried one. This may be the one I purchase, since the price is lower than the All American. The rubber gaskets
do need to be replaced from time to time though. The All American is said to be the best quality, but is a higher price. If you have the extra
money, it would be a good investment. It is also available in a larger size than others. This is also a consideration if you
want to process large amounts at a time. I have found canners at garage sales. Sometimes these are real bargains, but other times not. Look at
how many pieces you'll need to replace. Is the gasket in good condition and the dial gauge and fuse? Does the lid fit together
properly? Does it have the bottom rack? You'll need to make your decision after you consider all of these things. It can get
expensive if you need to replace too many parts. A new one may be a better choice.
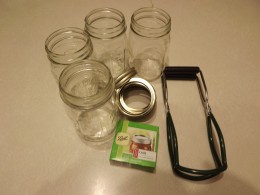
Using the Pressure Canner
1. First, get all
the supplies together. You'll need canning jars, lids, jar rings, a jar lifter and of course your pressure canner. If you
have a manufacturers manual, read the instructions thoroughly. Each canner works slightly different. 2. Check that the canner is working properly.
Have pressure gauges checked each year, if your canner has one. This can be completed for free at your County Extension Office.
Check the vent to see that it is clear. Make sure the gasket is in good shape. All American Canners don't have the gasket,
so you won't need to check it. 3. Pour 2 to 3 inches of water in the canner or follow manufacturers instructions. 4. Place the filled and lidded
cans with rings tightened on the rack which is in the canner. Be sure that you followed the proper instructions for leaving
proper head space for the jars. This will vary according to the type of food you are canning. 5, Place the gasket in your lid and tighten
the lid to the canner. 3.
You should let the steam vent open before you put the pressure gauge on. Bring the water to boiling until it steams. Let the
steam out for 10 minutes before putting the pressure gauge on. This will release any air that is in the canner. If some air
is trapped in the canner, it may not reach the pressure that is needed. 4. Put on the pressure gauge or shut the stopcock. Be sure
to use the proper pressure. Check processing times and pressures at The National Center for Home Food Preservation. This site will also give you further instructions for any kinds of food you would like to home can. 5. Once pressure is reached,
the canner will tell you or with a gauge canner, the control will jiggle at least 1-4 times a minute), set your timer for
the required time. 6.
Once the timer goes off, remove the canner from the heating unit. Let the it completely cool. Never remove the lid before
that point. Once the canner has completely cooled you can open the lid. The instruction book that came with you canner will
tell you how to determine this. 7. Use the jar lifter to remove the jars. 8. Let the jars cool. After completely cooled, check that the jars are sealed.
What to Expect from a Canner
If you purchase
a pressure canner, you can expect it to last for many years. My sister purchased hers 40 years ago and it is still working
fine. You will need to replace the gasket at times, but these don't wear out for a couple of years if you've taken care of
it and that is only if you've used the canner a lot. Even though there is some upkeep, the money you've saved will more than pay for it many times
over. This is one investment that you'll be happy you made.
Find Processing Times Here
|